
A teapot is one of the few pots judged by how it pours, how it balances in two hands, and how the lid seats after the third cup. None of that matters if the body folds on the wheel. The body itself is just a cylinder with opinions: a form you already know, shaped with more attention to weight, wall thickness, and where the shoulder lands. Here is the sequence, from wedged clay to a body ready to trim tomorrow.
Set Up Before You Touch the Clay
Most collapsed teapots were lost before the wheel started spinning. Decide the size first, then weigh accordingly. A body that holds two cups usually starts around 1.25 to 1.75 pounds of clay; a four-cup body, roughly 2 to 2.5 pounds. Wedge until the clay feels uniform and a wire cut shows no air pockets or hard spots.
Set your stool so your forearms sit level with, or slightly above, the wheel head. Your elbows will brace against your thighs for most of this, and a stool that is too low turns centering into a shoulder workout. Keep within reach: a water bucket, a sponge, a wooden rib, a soft rubber rib, a chamois, a needle tool, and calipers if you own them.
Center Properly, Then Stop
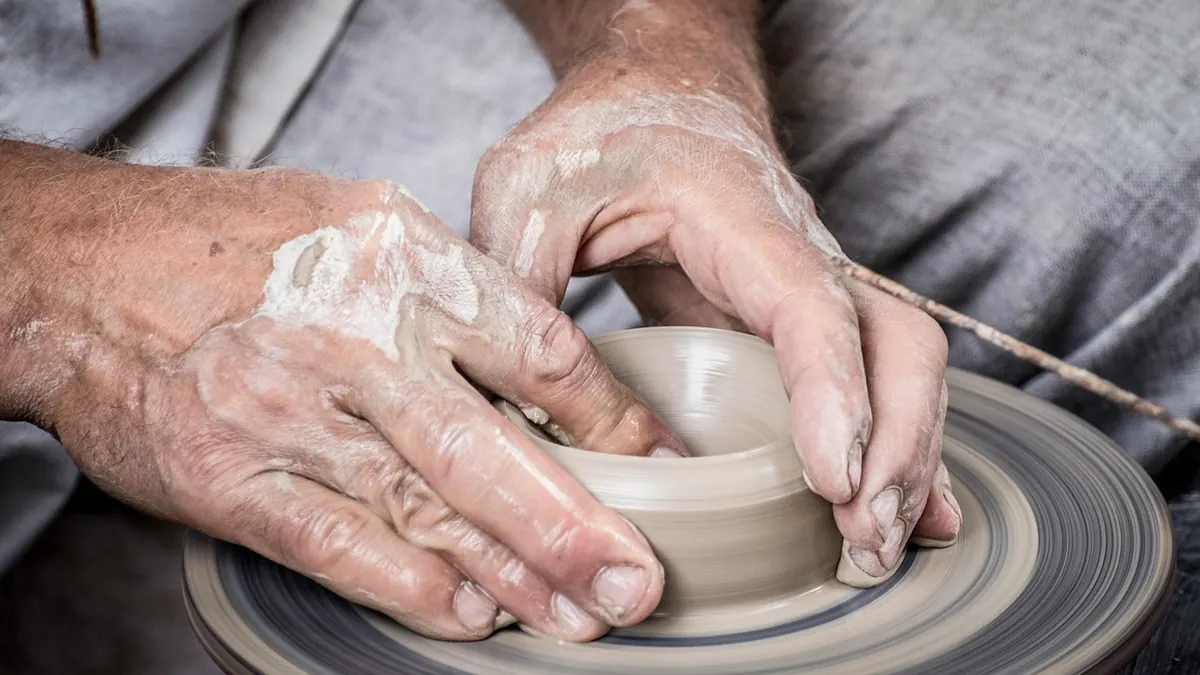
Press the ball firmly onto the wheel head, pat it roughly round, then bring up the speed. Cone the clay up and back down three times. Coning aligns the particles and compresses the base, and it also tells you whether the clay is too dry to cooperate. Lock your elbows against your thighs and lean in with your torso, not just your hands.
Wet your hands, but do not let water pool on the wheel head. A slick puddle makes the clay skate, and a skating ball never centers no matter how long you fight it.
You are centered when the top of the clay stops swaying, the walls rise evenly under your palms, and no bulge travels around the base. If two minutes have passed and it still wobbles, the ball is too large for your current grip or the clay is too stiff. Cut it off, wedge it again, and split it into two smaller balls.
Open the Floor and Set Your Base
Slow the wheel to a moderate speed. Press your thumbs or the first two fingers of one hand down the center, stopping well above the wheel head. For a teapot body, leave a floor about a quarter to three-eighths of an inch thick: you will trim a foot ring later, and the base has to carry a full pot plus a spout and handle.
Open the hole outward with your inside fingers while your outside hand supports the wall. A base that measures roughly half the widest point of the finished belly is a reliable starting proportion. Wider bases look heavy and turn a teapot into a planter; narrower ones tip once the pot is full.
Level the inside floor with your fingertips, then compress it in a spiral from the center outward. Spiral compression in one consistent direction helps prevent S-cracks later.
Pull Walls You Can Trust
The pull itself
Begin at the base, not at the rim. Your inside fingers press outward a little, the outside hand supports and follows, and both hands travel up together in one slow, continuous trip. Think of moving clay rather than stretching it. If your outside hand loses contact with the inside fingers through the wall, you are squeezing blind.
How much per pass
Take off a small amount each time: three to five pulls is right for a teapot body. Aim for a finished wall around five to eight millimeters, roughly three-sixteenths to five-sixteenths of an inch. Paper-thin walls feel elegant until you have to attach a spout to them.
After every pull, compress the rim with a damp sponge or a light pinch. This knocks down the thin, drying lip that otherwise cracks before you get back to it. If you need to pause, drape a piece of plastic over the top rather than soaking the rim with water.
Shape the Belly, Shoulder, and Neck
Sketch the profile in your mind before the last pull: base, belly, shoulder, neck or gallery. Then shape from the outside with your hand or a rib while your inside hand follows the same curve, keeping the wall thickness even. Wherever you push from outside, something should be supporting from inside.
Widen the belly in the lower third with light outward pressure from inside the pot. Bring the shoulder in slowly above it. That inward curve is where the lid will sit, so leave enough clay there to cut a gallery or throw a short neck later. Do not rush to a narrow opening; a half inch of wall at the shoulder gives you room to trim.
Finish with a soft rubber rib or a chamois for one compression pass over the whole profile. The surface should feel firm and slightly tacky, not sloppy. A body that feels bottom-heavy when you imagine lifting it usually has too much clay left in the base.
When Things Go Wrong
- The wall folds: the clay is too soft or you are pulling too fast. Slow the wheel, use less water, and firm the wall with a rib before continuing.
- An S-crack appears in the base: usually too much water in the floor or compression done in changing directions. Keep the floor drier and compress in one steady spiral.
- The rim cracks while you work: the rim dried out between pulls. Sponge it lightly and cover the pot when you stop.
- The pot twists and thins on one side: you are taking too much clay per pull. Make more, gentler passes.
- The shoulder droops: the form is over-wet. Let it stiffen for ten minutes before the final shaping pass.
Cut Off, Trim, and Dry Slowly
Run a wire under the body, lift it onto a board or leave it on the bat, and wrap it loosely in plastic. Let it firm to leather hard over a day or more, depending on your climate. Trim a foot ring that echoes the belly, cut the gallery for the lid, and attach the spout and handle only when the body and those parts are at the same moisture — a wet spout on a dry body will crack at the seam.
Dry the finished body under plastic, opening the wrap a little each day, with extra attention to the base. Rushing the last stage undoes everything the wheel work got right. Keep a note of your clay weight, finished height, and wall thickness; the numbers from your first decent body are the best starting point for the second one.
Photo: LubosHouska / Pixabay